> ## Documentation Index
> Fetch the complete documentation index at: https://docs.dograh.com/llms.txt
> Use this file to discover all available pages before exploring further.
# Your First Agent in 5 Minutes
> Build and talk to a working voice agent in five minutes using Web Calls — no telephony setup required.
This is the fastest path to a working voice agent. You'll create an agent, get a generated conversation flow, and talk to it in your browser — no phone number, no telephony provider, no configuration.
Using the hosted platform, go to [app.dograh.com](https://app.dograh.com). Self-hosting locally? Use `http://localhost:3010` instead, and follow [Getting Started](/getting-started) first to get the platform running.
## Step 1: Create an agent
Go to [app.dograh.com/workflow](https://app.dograh.com/workflow) and create a new agent.
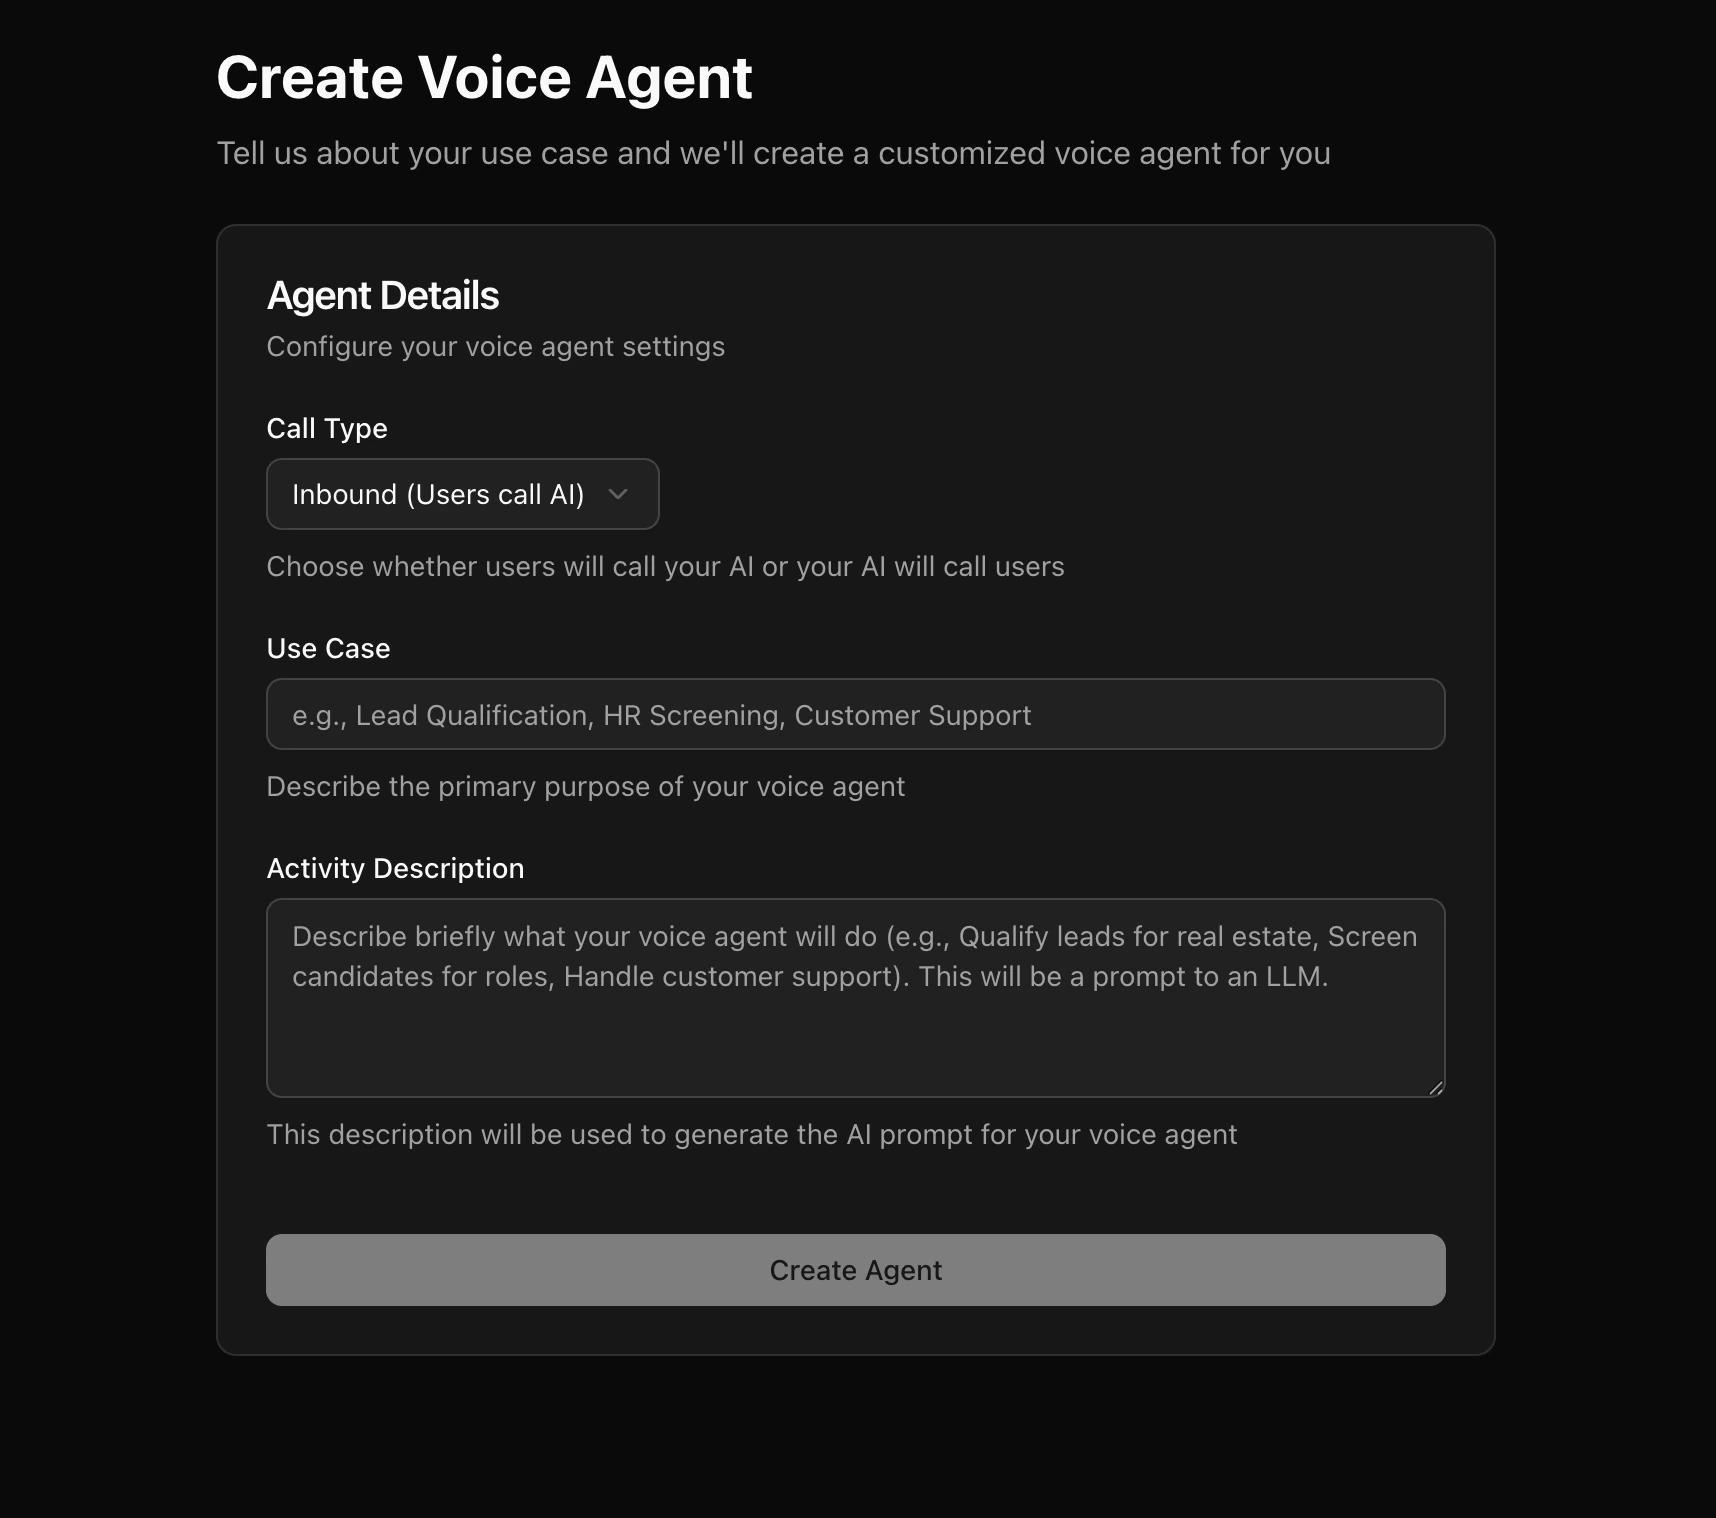 You'll be asked for:
* **Direction** — Inbound (agent receives calls) or Outbound (agent makes calls). Pick either; it only affects the starting prompt.
* **Use case** — a description of what the agent should do, e.g. *"Book a haircut appointment, ask for preferred date and time, confirm before ending the call."*
This description is sent to an LLM to generate a starting workflow. The more specific you are, the better the generated prompts and pathways will be.
## Step 2: Land in the workflow editor
After generation, you're dropped into the [Voice Agent Builder](/voice-agent/introduction) with a graph already built for you — typically a **Start Call** node, one or more **Agent** nodes with prompts for your use case, and an **End Call** node, connected by pathways.
You don't need to understand the full [graph model](/voice-agent/introduction#the-graph-model) yet — the generated agent works out of the box. You can come back and customize prompts once you've heard it talk.
## Step 3: Talk to it with a Web Call
In the agent editor, start a **Web Call**. This runs the full pipeline — speech-to-text, LLM, text-to-speech — straight from your browser microphone, exactly like a real phone call would, just without a phone number.
While the call is active, you can watch:
* The **live transcript** as the conversation happens
* **Node transitions** as the agent moves through the graph
* Any **tool calls** the agent makes
Talk to it like a real caller would. Try to get it off-script — say something unexpected — and see how it responds.
## Step 4: Iterate
Didn't go the way you wanted? Open the node whose behavior you want to change and edit its prompt directly. Save, then start a new Web Call to hear the change immediately. No redeploy, no restart.
Common first tweaks:
* Adjust tone or wording in an **Agent** node's prompt
* Add shared instructions (tone, objection handling) to the [**Global**](/voice-agent/global) node
* Add a [**Webhook**](/voice-agent/webhook) node to send call results somewhere once you're happy with the flow
## Next Steps
You have a working agent that runs entirely in the browser. From here:
* **Take real calls** — connect a [telephony provider](/integrations/telephony/overview) and trigger calls via [API Trigger](/voice-agent/api-trigger) or inbound routing.
* **Learn the graph model in depth** — see [Voice Agent Builder](/voice-agent/introduction) for all node types and how pathways work.
* **Give it tools** — let the agent call external APIs or transfer calls with [Tools](/voice-agent/tools/introduction).
* **Embed it on a website** — skip telephony entirely and let website visitors talk to the agent via [Add to Website](/voice-agent/add-to-website).
You'll be asked for:
* **Direction** — Inbound (agent receives calls) or Outbound (agent makes calls). Pick either; it only affects the starting prompt.
* **Use case** — a description of what the agent should do, e.g. *"Book a haircut appointment, ask for preferred date and time, confirm before ending the call."*
This description is sent to an LLM to generate a starting workflow. The more specific you are, the better the generated prompts and pathways will be.
## Step 2: Land in the workflow editor
After generation, you're dropped into the [Voice Agent Builder](/voice-agent/introduction) with a graph already built for you — typically a **Start Call** node, one or more **Agent** nodes with prompts for your use case, and an **End Call** node, connected by pathways.
You don't need to understand the full [graph model](/voice-agent/introduction#the-graph-model) yet — the generated agent works out of the box. You can come back and customize prompts once you've heard it talk.
## Step 3: Talk to it with a Web Call
In the agent editor, start a **Web Call**. This runs the full pipeline — speech-to-text, LLM, text-to-speech — straight from your browser microphone, exactly like a real phone call would, just without a phone number.
While the call is active, you can watch:
* The **live transcript** as the conversation happens
* **Node transitions** as the agent moves through the graph
* Any **tool calls** the agent makes
Talk to it like a real caller would. Try to get it off-script — say something unexpected — and see how it responds.
## Step 4: Iterate
Didn't go the way you wanted? Open the node whose behavior you want to change and edit its prompt directly. Save, then start a new Web Call to hear the change immediately. No redeploy, no restart.
Common first tweaks:
* Adjust tone or wording in an **Agent** node's prompt
* Add shared instructions (tone, objection handling) to the [**Global**](/voice-agent/global) node
* Add a [**Webhook**](/voice-agent/webhook) node to send call results somewhere once you're happy with the flow
## Next Steps
You have a working agent that runs entirely in the browser. From here:
* **Take real calls** — connect a [telephony provider](/integrations/telephony/overview) and trigger calls via [API Trigger](/voice-agent/api-trigger) or inbound routing.
* **Learn the graph model in depth** — see [Voice Agent Builder](/voice-agent/introduction) for all node types and how pathways work.
* **Give it tools** — let the agent call external APIs or transfer calls with [Tools](/voice-agent/tools/introduction).
* **Embed it on a website** — skip telephony entirely and let website visitors talk to the agent via [Add to Website](/voice-agent/add-to-website).